Guanlun Zhao
Web developer and learner who occasionally writes.
Find me on Github: github.com/guanlun
Simple JS Script to Watch Changes and Rsync

I created a simple Node.js script to watch local file changes and rsync it to a remote server (I’m too lazy to figure out how to use stuff like “inotifywait” :P).

It’s for a C++ project that I have to do on a remote server because I couldn’t get it compiled locally after hours. Although I was once (maybe 5 years ago) addicted to using vanilla vim for C++ coding and finding syntax errors in the long long list of g++ output, I have to admit that my C++ skills (and my patience) are no longer what they’re used to be when I was a college freshman. (Ouch)

While I can’t compile it locally, it doesn’t stop me from using the other IDE features. So I downloaded the code as well as the headers and set it up in a local IDE so that I can have all the goodies, like being told I’ve passed a reference to a pointer instead of pointer to a pointer. (Ouch) And then sync those files to the server.

It isn’t complicated at all, is it?

Let's play battle simulator

I just made a battle simulator for my course project.

Originally the project was for creating a flock simulation but I took a step further and made this.

Enjoy!

Play it here.

Simulation of metal welding effect

Recently I made this metal welding effect simulation using three.js.

Check this out here.

Demo

React List Scrolling Performance Tips

Say you have a list / grid with thousands of items, what can you do to keep the scrolling smooth? Recently at work we encountered a problem with an asset explorer that contained around 6,000 assets and we expect the user would scroll up and down all the time to find the assets they want. That makes scrolling performance critical to the user experience. A simple test that renders all the items at once quickly ruled out the brute-force approach.

Let’s take a deeper look at the use case first. The asset grid is a child of the asset explorer. Above the list we have some fancy graphics that changes as the user scrolls down (some sort of parallax scrolling stuff) so we need the onWheel listener at the container level.

A Simple Illustration

We then took a look at rendering only the visible items by adding a container component (let’s call it ViewportScrollProxy). We put the item inside the ViewportScrollProxy and based on its relative position, and render null if the item is out of the viewport.

Does it work? Well, partially. After applying this change the scrolling is still a bit janky so I opened the chrome devtools and did a timeline profiling. It seemed that checking which of the 6,000 are within the viewport every time a scroll event is fired is putting some serious load on the CPU. How do we effectively reduce the load when scrolling then? List virtualization comes to rescue.

List virtualization means we do not have a DOM element for each item to display. Instead, we only maintain a handful of <div>s enough to fill in our grid view. For our asset explorer we’re going to call them GridItems. the GridItems are reused to display different asset thumbnails. As we’re scrolling up and down, the items get updated and rendered in the grid view.

There are a few nice libraries available for virtualized lists and grids in react, e.g. react-virtualized. However it comes with default stlyes that we don’t want. Besides, it’s quite a heavy-weight library and we’d not like to see additional MBs added to our already large codebase to slow down our app loading time even further. So why not do it ourselves? It’s just a list view that listens to the scroll event, updates some position properties and re-populates the child components, right?

So that’s what we have. Based on the height of the container we determine the number of GridItems needed to fill it. Say its height is 1000px with 180x180 items (which means we need Math.ceil(1000 / 180) + 1 = 7 rows and 7 * 3 items). Explorer listens to the wheel event, update the fancy landing graphics and passes the scrollTop prop to the GridView. GridView takes a look at scrollTop, determines how many rows have been scrolled (i.e. number of rows above the first visible row, we call it numRowsAbove) and applies a paddingTop css property to position itself inside the viewport. If each row has 3 items and 4 rows are above, we start from the 13th item and populate 21 items into the GridItems.

Can we do it better? Do we need to re-render GridView for every wheel event? Looks like we don’t. The only thing we need to update in GridView is paddingTop. That essentially means we should not pass props to GridView upon each wheel. We simply need to dispatch an action ExplorerAction.scrollExplorerwhich calls ExplorerStore.scrollExplorer which emits EXPLORER_SCROLL_EVENT which is listened by GridView (phew~). And its the handleExplorerScroll function, we calculate numRowsAbove and call setState (notes that we used to do that in render!). This essentially saves us from invalidating the current view every single frame. Now we only re-render the GridView and re-populate the children every time we scroll past an entire row (of course we need to use shallowCompare to skip the unnecessary updates).

The result is encouraging. We’re now able to reach around 60FPS!

One additional and probably subtle performance improvement could be realized by replacing the paddingTop: 100px with transform: translateY(100px). However we’d need to controll the offset ourselves then, since we might scroll beyond the bound. I’m not going to elaborate in this article.

Maintain Dragging when Mouse is outside Browser Window

When using the mousedown, mousemove, mouseup events for dragging, it’s sometimes annoying when the user moves the mouse outside the view, or sometimes, the browser window. For example, you have a canvas with a bunch of items drawn on it and you’d like to implement to drag-to-select feature. When the canvas does not occupy the entire screen (which is normally the case), dragging outsides the canvas would be painful.

So instead of attaching all your listeners to the canvas element itself, attach them to the document.

Check out this jsfiddle I made as a sample demo:

TIL: HTTP 302 Redirect CORS with Null Origin

Say a page on domain www.foo.com Initiated a XHR to asset.foo.com. The API endpoint on asset.foo.com responded with a 302 header pointing to image.foo.com. What will happen?

Unfortunately, browsers would consider this redirect in a “privacy-sensitive context” and set the Origin header to null in the request to image.foo.com, preventing that XHR unless the Access-Control-Allow-Origin header on image.foo.com is set to *.

If we don’t wish to set a permissive CORS header, seems the current solution is to use HTTP 200 with the redirect URL in the response body…

TIL: AWS S3 and CloudFront

buting static assets for a website, use S3 or CloudFront to reduce the load on your own server.

Use CloudFront to serve assets that require fast delivery (e.g. css and javascript files) and S3 to serve relatively large files that are not requested so ofter and less significant to the web performance (e.g. videos, sounds).

S3 charges according to how much data you store while CloudFront charges mainly by how much data is transmitted.

CloudFront can be used to serve asset on S3.

TIL: Design Patterns - Stretegy Pattern

For a base class with a number of subclasses, each subclass may have different behavior for a certain action. The stretegy pattern encapsulates each action into a separate class and therefore enabling independent behavior selection at runtime.

  • A family of algorithms is defined and they extend a single interface representing the action to be performed.
  • The classes performing those actions maintains a reference to a specific stretegy object.
  • The behavior could be updated during runtime simply by assigning another action object.
  • This pattern decouples the action logic from the classes that perform those actions, reducing complexity and enabling change of behavior.
TIL: ES6 Object Initialization with Expressions

We can actually do this in ES6:

const key = 'foo';
const obj = {
        [key]: 'bar'
};

instead of having to do:

const key = 'foo';
const obj = {};
obj[key] = 'bar';
TIL: How V8 Handles Javascript Objects Internally

TIL that V8 handles Javascript objects in a quite static way. Instead of creating a table that computes the keys’ hash values and look up the dictionary for that hash code, it actually creates internal “classes” for faster object access.

When creating a new object and augmenting this object by adding / deleting properties, V8 creates a book-keeping class that uses static offsets to locate each fields. This saves the hash code computation during lookup and greatly improves performance when a lot of object key accesses are performed.

Inside-out Sadness in Pure CSS

I created the Inside-Out character “Sadness” in pure CSS.

My helpful screenshot

Check out the source code here.

TIL: Unicode and UTF-8
  • Unicode is a character set. It specifies how codepoints (numbers) are mapping to characters but does not specify how numbers are stored as bits.
  • UTF-8 is an encoding. It specified how codepoints are stored at bits. UTF-8 encoded characters can be 1 to 4 bytes long.
  • UTF-16 is also a variable length encoding method and it starts with 2 bytes.
TIL: HTTP Compression
  • Web clients send HTTP requests to servers with a list of supported compression schemes in the Accept-Encoding header (e.g. gzip, deflate).
  • If the server supports one of the compression schemes, it compresses the data using that algorithm and specify that in the response Content-Encoding header.
TIL: HTTP Redirect 301 vs 302
  • 301 means the resource is moved permanantly to a new location and the client should not request the original location.
  • 302 means the resource is temporarily moved and the client should continue requesting the original URL.
TIL: Cross Origin Resource Sharing (CORS)

Resources like images, styles and scripts can be embeded from any other domain. But AJAX requests to other domains are limited due to the same origin policy.

CORS works by sending the Origin header in the HTTP request, e.g., Origin: http://example.com and setting the Access-Control-Allow-Origin for the server.

TIL: Pushing Data from Server to Client
  • HTTP server push: The server does not terminate a connection after response data has been served. It leaves the connection open and if any event occurs, it can send data out immediately.
  • Long polling: The client requests data from server, and if the server does not have any information available to send to the client, when the poll is received, it holds the request open and wait for response information to be available.
  • Comet: Long-held HTTP request allows the server to push data to the client.
TIL: Some Javascript Good Parts

Javascript Prototypal Inheritance

Javascript has a half-prototypal-half-classical OOP paradigm. new Foo() creates an object that inherits not from Foo but from Foo.prototype.

Javascript Function Invocation Patterns:

A method is a function as a property of an object. When a method is invoked, this is bound to the object. When a function (not an object method) is invoked with this pattern, this is bound to the global object, rather than the this variable of the outer function.

Rendering Engine for My Final Year Project

For my undergraduate final year project, I made a realistic rendering system based on nVidia’s Optix ray tracing framework. Our rendering system is able to produce pictures generally comparable to those produced by some advanced rendering systems, for example, the Cycles rendering engine in Blender, for certain types of scenes. It’s also able to rendering realistic animations with the help of the Bullet physics library.

The project lasted one academic year. For the first half we concentrated on a CPU-based ray tracing system with some interactivity and limited effects. However as the scene becomes more and more complicated, the CPU ray tracing was unable to render efficiently although with different acceleration techniques. And that was when we decided to turn to GPU. Optix provides a pretty good framework that enables us to leverage the parallel processing power of graphics cards, along with some interesting software-level acceleration techniques, (primarily different types of bounding volume hierarchies for various purposes). This means we no longer need to try very hard to optimize the code for better performance, but could focus more on the rendering effects.

Writing code for Optix that runs on the GPU is pretty much like writing shader programs for shader languages like GLSL. We write some “programs” in CUDA that are executed on the graphics cards. The “programs” include ray generation programs, intersection detection programs, hit programs, miss programs and so on. The hit programs (any-hit and closest-hit) are usually the most important. Any-hit programs are triggered whenever a ray intersects with an object and is usually used for shadow computation, while closest-hit programs are called when a ray first intersect with an object (nothing in front of it), and is mainly used for shading computation (lighting, generating secondary rays, etc.).

I implemented different realistic effects on top of the demo programs patched with the Optix SDK. The rendering effects include those created by different distributed ray tracing techniques, (e.g., soft shadows, glossiness, motion blur and depth of field), and also more advanced (and of course more complicated) techniques like global illumination, subsurface scattering and anisotropic shading.

I learned many of the advanced rendering effects when I was using Blender. The Cycles rendering engine in Blender included a whole bunch of algorithms that are able to produce stunning visual effects. After watching some video tutorials on blenderguru.com and other similiar online resources, I gradually learned how these effects works and how to implement them. Here are some of the example pictures produced by my rendering engine:

My helpful screenshot

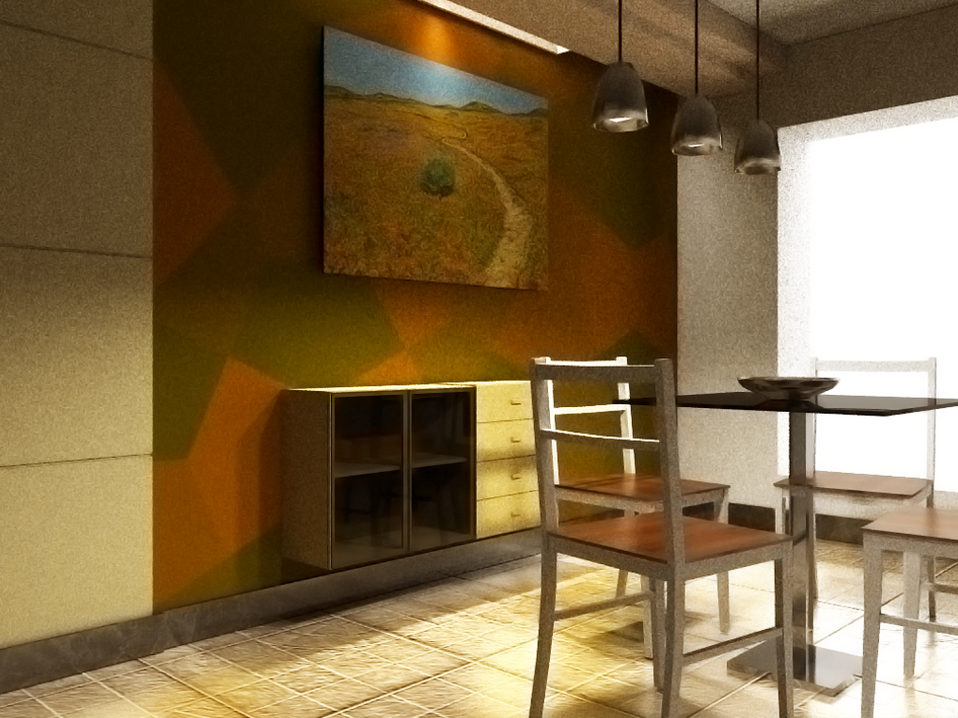
A dining room scene featuring global illumination

My helpful screenshot

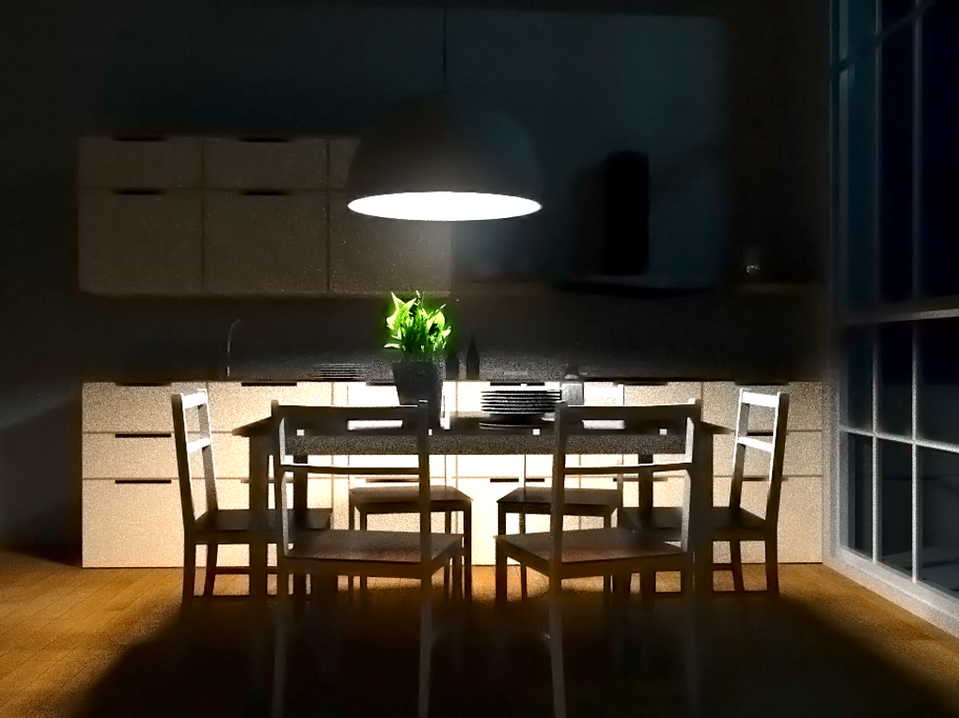
Kitchen scene at night. Note that global illumination makes the background in the dark quite realistic (althrough with noises)

My helpful screenshot

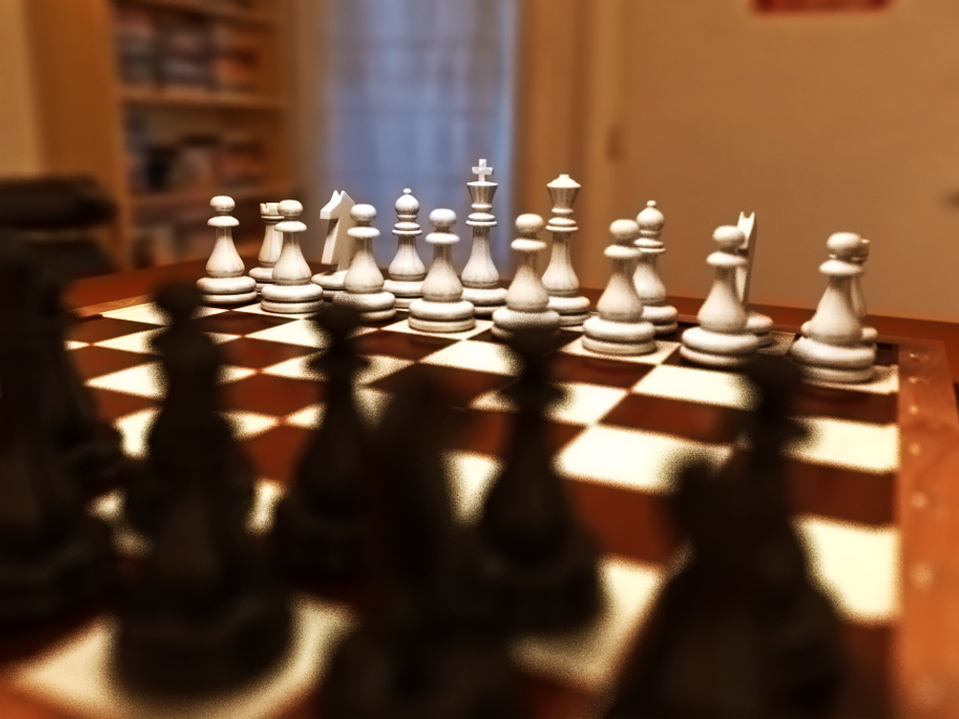
Chess board with depth of field and environment mapping, and also global illumination

My helpful screenshot

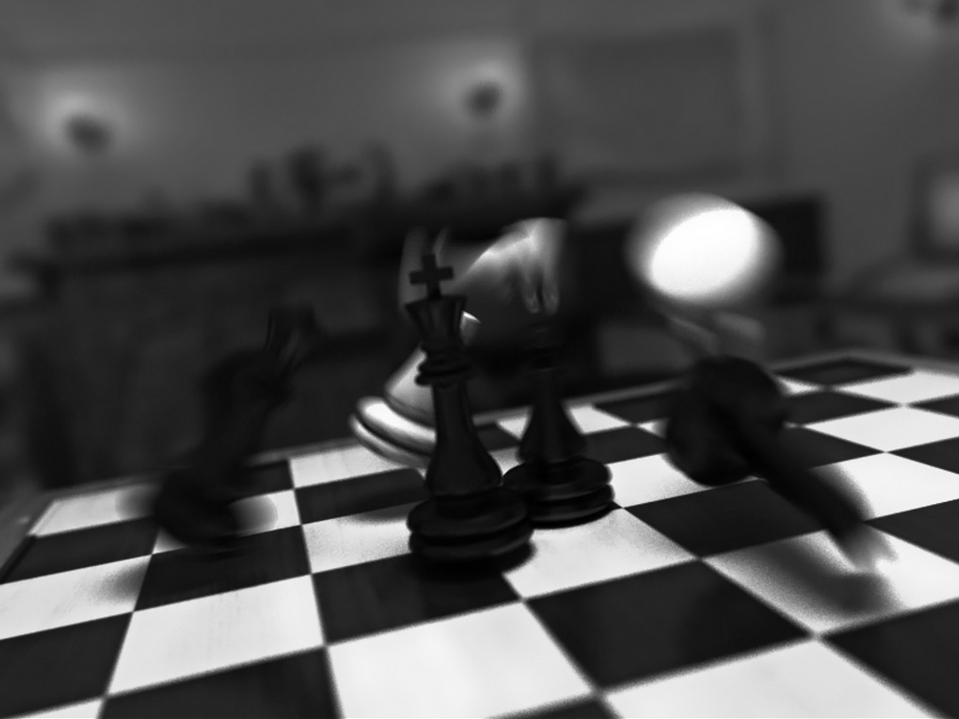
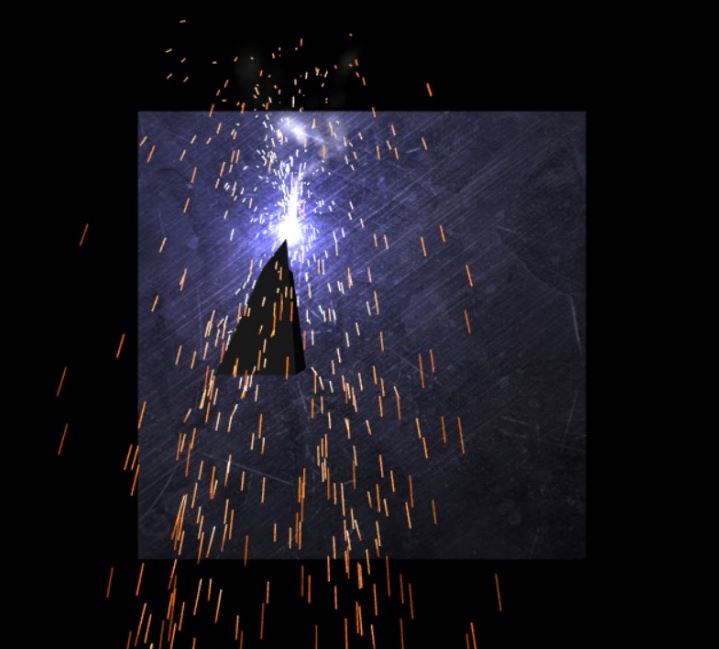
Chess pieces simulated and rendered with motion blur

My helpful screenshot

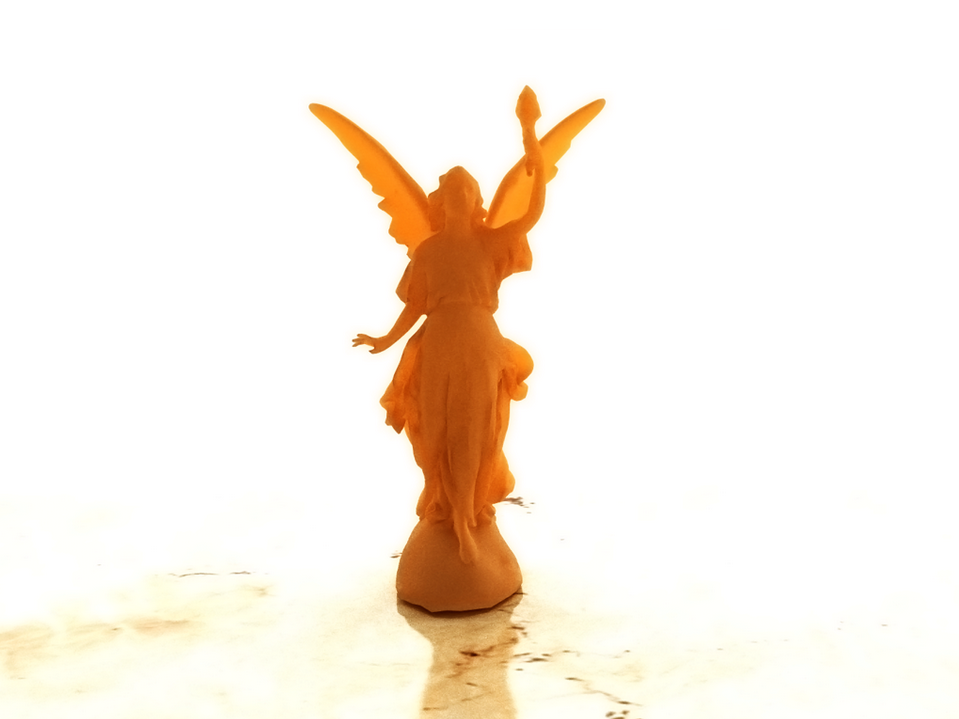
Angel with subsurface scattering, some part of it look semi-transculent

My helpful screenshot

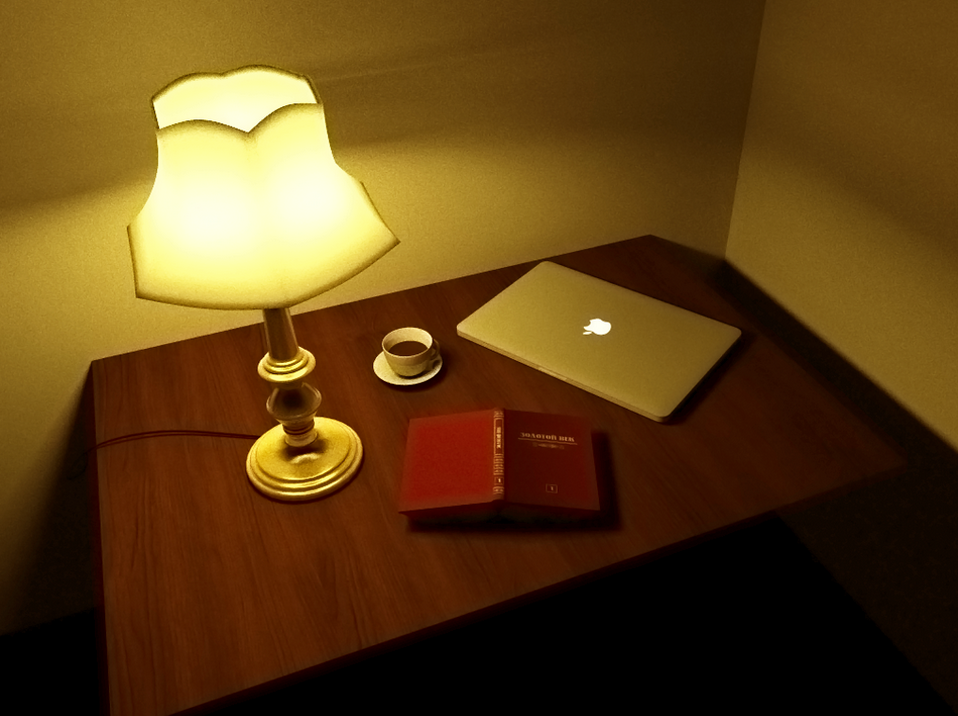
Desk scene at night. Subsurface scattering makes the lamp cover quite real

My helpful screenshot

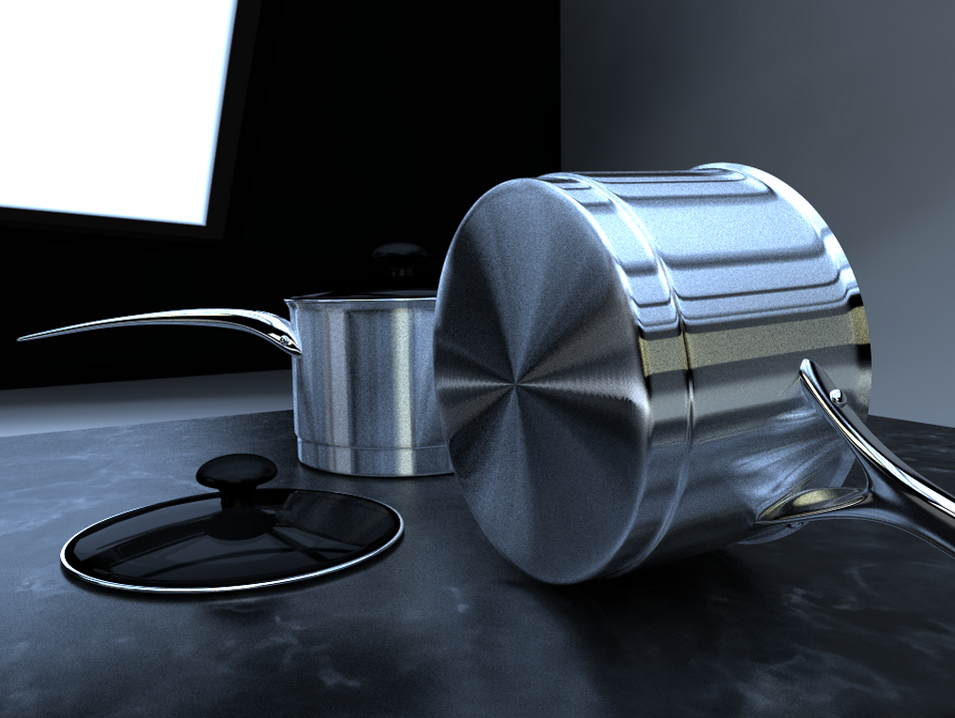
Pot with anisotropic shading effects
Blender Script Hacking for Custom .obj File Output

While I was working on my undergraduate final year project on computer graphics, I found Blender to be a awesome 3D modeling software. Creating scenes, making textures, applying lighting are easily done in Blender and it’s completely free. However, it was a nightmare when I needed to output my scenes in blender and render them in the render engine I built. Hoping to make use of the default .blend file for interfacing with my renderer, I spent around a month trying to crack the Blender source code for saving and loading .blend files. And that was such a PAIN.

The .blend files consists of not only objects, material, textures and lighting, which are basically what I needed, but – hundreds of other random and strange staff, including animation (which I didn’t need), node data (nodes are great, indeed, but not what I wanted), and window layout (uh!). And not surprisingly, the file components are interconnected with each other, which took me forever to understand the file structure.

That’s when I realized it would be a entire final year project to build a Blender file reader and I decided to give up and try other file formats. Wavefront obj files seemed a good candidate compared to other exotic (not really) formats.

Wavefront obj files are pretty simple, which includes vertex data, geometry primitives, material information, etc. But I wanted more. I wanted more material information than just those basic parameters usually for Phong shading. I wanted glossiness, index of refraction and subsurface scattering. I also wanted normal maps and specular maps which Blender failed to output in the way I liked.

It did not take me too long to find that Blender actually used Python instead of native code to handle file export, which saved me from recompiling the whole code base each time I make changes (I actually was prepared to build the entire Blender application and got the source code built on my computer in Xcode). The file was located in this directory:

/Applications/Blender/blender.app/Contents/MacOS/2.68
/scripts/addons/io_scene_obj/export_obj.py

Hacking the code was not very straightforward, since when dealing with a material object in the scripts I did not have any information about its attributes. Therefore my only solution was to write the properties into the output file using Python’s runtime self-introspection, object by object to find out which objects contained which properties. It was a painful and boring process but finally I located the mat object contained information like mat.raytrace_transparency.ior, mat.raytrace_mirror.gloss_factor, mat.subsurface_scattering.scale and so on. Then I was able to write out these properties to my custom .obj file and load them in the parse I wrote to connect it to my renderer.